The Zen of Rack Repair by John H Twist, University Motors Ltd .
I repaired a rack and pinion for the Project Midget in about three hours. Of
course, I have the advantage of a full shop and the experience of having repaired
a hundred or more in the previous thirty years, so the job was not difficult.
Yet, after years of restoration, I want to emphasize that what I did today was
FUN! I so thoroughly enjoy this type of work – and I suspect more than
a few of the readers enjoy these type of rebuilds, too. It’s a guy thing.
I began with a pretty nasty looking piece of automobile, and when I was done
it not only worked – it was a piece of beauty. My own opinion is that
many of us are involved in middle management jobs where the results of our efforts
are not so quickly evident, if at all. Rebuilding, refinishing, restoring components
for your project car… Even in your next life, what could be more rewarding?
The overview is straightforward. You need a work site to work, you need the
right tools, you need a plan (or some experience), and you do, truly and absolutely,
need at least a workshop manual if not a factory parts book.
I proceeded on this project as I do on most: initial cleaning; disassembly;
thorough cleaning and inspection; then the polishing, surfacing, painting, chasing,
repairing, renewing, painting, plating, powdercoating. When this work is totally
completed, then build up the sub-units, do a mock assembly if necessary to test
for end float, clearances, etc. Finally comes the thrilling part – the
full assembly.
Some assemblies are pretty simple – a taillight assembly. Some are complicated
– an engine or gearbox. But the overall method is nearly always the same.
After an initial quick cleaning, just so that I wouldn’t unnecessarily
foul my tools or clothes, I began the disassembly.
The tie rod ends were seemingly frozen onto the tie rods. I fiercely clamped
the tie rod ends in my Wilton vise, and slackened the jam nuts on the tie rods.
One came loose – the other was stuck. So, I moved the oxy-acetylene torch
to my bench, heated the tight nut red hot, and removed it easily with a large
wrench. Then, I clipped the original clamps holding the gooey rack boots and
withdrew those.
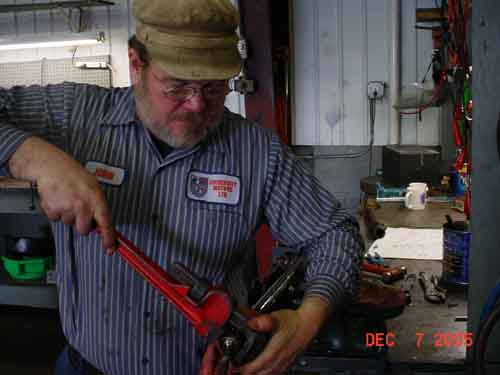
The rack is round at one end and in the shape of a “D” on the
other. That flat spot affords a good purchase, so with copper inserts protecting
the rack from the serrated vise jaws, I clamped the rack tightly. I then used
a pipe wrench to unscrew each inner tie rod end from the rack. A PIPE WRENCH?
It is my experience that this works better than any other tool and those nasty
little scars on the inner tie rod housings come off later.
Unscrewing these inner tie rod ends shears the locating tabs of the lock washers
– but we repair those later, too.
Still working with the inner tie rod ends, we clamped the outer flange of
the tie rod end with the sharp edges of the vise jaws (no copper protection
this time). My associate held the tie rod aloft with a length of pipe. I used
that dreadful pipe wrench again to unscrew the cap from the inner tie rod end.
Both came apart easily, although both major parts of the inner tie rod end were
now scarred by the vise jaws and the pipe wrench.
Then the damper on the RH side was removed, then the damper above the pinion
on the LH side came out with a large wrench. The RH side had a fibre washer,
a spring and a copper plunger. The LH side had a spring, a copper plunger, and
several spacer shims.
Now I removed the brass pinion cap with a socket and ratchet Once that was
out of the way, I pushed the pinion through, catching the nylon spacer and felt
washers, along with the conical washers fitted either side of the pinion. The
rack was then easily removed from the rack housing. Only a grease fitting on
the RH side was left.
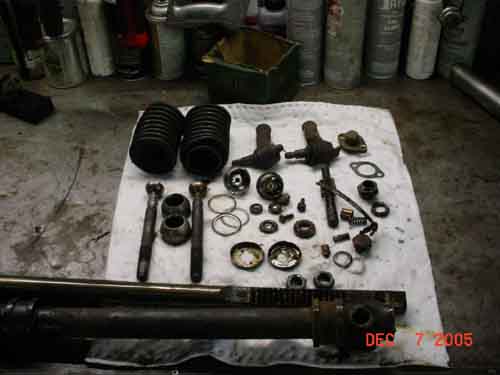
Now follows step three – the REAL cleaning and layout. We have the advantage
of a powerful hot water washing machine in our shop, so hand cleaning is not
as necessary and a great amount of time is saved. You can use your wife’s
dishwasher for the same effect, but when I tried ours at home on day when Caroline
was out, I heard about it for a week! Something about the ring of grease on
the inside of the unit….
Mineral spirits are wonderful for cleaning – and I did use those for
all the small pieces, shaking them in a can while immersed in this wonderful
fluid. Diesel fuel works about the same but it’s difficult to eliminate
the odor from your hands. Once you have cleaned everything, it’s time
for the real work.
Step four – polishing, surfacing, painting, buffing, chasing, repairing,
……
The brass pinion cap responded well to a soft wire wheel and the buffing wheel.
It’s a dirty job, and you can burn your fingers from the heat –
but GOSH it looks great all cleaned up.
The pinion itself had more rust on it that it first appeared. The splined
end returned to a silvery, natural state when pressed firmly against the stiff
wire wheel. We have the advantage of having a lathe in the shop, so I spun the
shaft, polishing both ends first with 180, then 320, and finally with 600 paper.
The rack only had flecks of rust – but I love that lathe, so I spun
the rack, following it back and forth with 180 and finally with 600 paper. It
was nice and shiny after my attention. I used the stiff wire wheel on the teeth.
The rack housing – that was pretty rusty. I should have worn a mask
while wheeling the rust from that unit – there was a cloud all around
me of iron oxide and some dirt. When I got it as clean as I thought I could
it was over to the 1946 Logan lathe with some 40 grit paper (rough stuff!),
back and forth on the center tube. It was looking pretty nice when I called
it quits.
The tie rods themselves were rusty so I wire wheeled them, just as the rack
housing, I spun these on the lathe, too, but used 100 grit paper on the rods
– just enough to get through the surface so the paint could make a good
adhesion.. I also ran a die over the threads. Now these tie rods are hardened
– almost as much as the die – so I used lots of oil and went slowly.
I have broken dies doing this same job. These had a 5/8-18 thread. I ran a tap
through the jam nuts here, too.
I wire wheeled the cap nuts which held the plungers and the grease zerk. And,
then again, cleaned everything. This time I used some mineral spirits and a
can or two of carburetter cleaner and a lot of compressed air. Every single
component was powder dry!
The original specification is a semi-gloss black, but gloss looks so much
better! I painted the rack housing, the tie rods, the jam nuts, and the plunger
caps and let them dry.
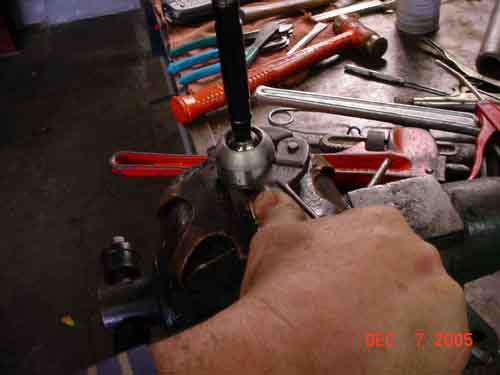
The only real “repair” here was to prepare the locktabs for re-use.
I found a socket with the same OD as the inner tie rod end. I placed the locktabs
over the socket and used a small hammer on the outside diameter to smooth out
the old dimpled areas. Then I used a chisel and hammer to score the inside diameter
at 90 degrees to the old tabs, then used a pair of sidecutters to shear away
a fold of metal – duplicating the original locktab. Of course, new ones
are available but part of this process is saving everything you can!
Sub Unit Assembly
Only the inner tie rod ends needed assembly. I used very light grease and
test fitted the housings to the inner tie rod assembly base. One was a little
loose, so I surfaced the bottom of the housing. One was a little tight, so I
surfaced the back side of the little button on which the tie rod articulates.
I used an adjustable spanner (that’s the American name) to draw the housings
tight with the base. BUT – remember that those caps and bases were marred
from the vise jaws and the pipe wrench? Back to the lathe! I chucked up the
inner tie rod ends, held the tie rods in a moving center clamp, and skimmed
the sides. They were smooth and a perfect fit into those locktabs!
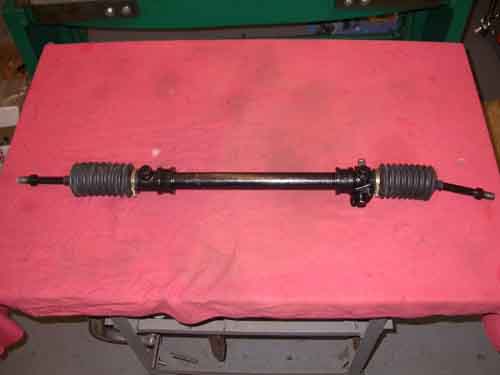
Final Assembly
I should have test fitted the pinion to the rack housing, but I expected that
there wouldn’t be a problem (and I was right), So, I started by fitting
one tie rod assy to the rack. Once tight and punched (to prevent unscrewing),
I fitted the rack to the rack housing and then fitted the other tie rod. Then
came the pinion, followed by the plungers. All this was done with very light
grease. Pictured, it still doesn’t have rack boots, but it will.
You would not be rebuilding your sportscar if you didn’t enjoy the process.
Clean, clean, clean! And when in doubt about how to perform a certain task,
ask an expert. Repairing your rack and pinion, starter motor, gearbox, even
your speedometer, can be great fun and will provide you with a tremendous sense
of satisfaction.